Three weeks ago I wrote a note to myself that "this project is taking over my life!" And that was before we really started to kick everything into gear. For the last two weeks, we have been spending all non-work and non-sleeping hours focused on finishing the van and leaving the state by June 1st. We did it, but oh boy was it a push.
In the last two weeks, we have:
- Installed all cabinets and shelves;
- Waterproofed and laminated the counter tops;
- Built a shower, including waterproofing the walls, creating a waterproof basin, tiling the floor, and constructing a curtain track;
- Finished the walls;
- Added the main table and a pop-up desk;
- Installed a gray tank;
- And many more seemingly inconsequential tasks that all add up to a neat and finished home.
By far the most difficult part was the shower. Building a shower is not easy in normal circumstances, but adding in the complexities of it being inside of a vehicle is a chore! Our shower isn't a permanent fixture, but I suppose everything in the van has to function as multi-use space. The shower shares the same floor print as the toilet and dining table. When we need to use it, we will fold up the table, remove the bench seat that hides the toilet, pull the shower head and curtain from their hidey-hole in the neighboring cabinet, and run the curtain along the tracks, which encapsulates the ceiling vent/fan. It seems like a clever system, but in the rush to get out of town we didn't get a chance to test it. Whoops! Guess that will be a fun adventure for the road.
Even when not actively "constructing," there has been lots of behind-the-scenes projects that include all of the standard hassles of moving: packing, cleaning, changing your mailing address, scheduling final meet-ups with friends, etc. I was quite restless for a few days when I had all of my clothes packed up in boxes and scattered around our bedroom, knowing that there was a good chance that not everything would fit into the van and I would have to reassess what would come with us again. Luckily, I was able to cram it all in there, because I don't think I could have easily nixed a significant amount more – I'm already down to less than half of my closet from three years ago. (Tip: if you need to downsize, Marie Kondo has some clever organizational guidance, but it's hard to let stuff go when it still "sparks joy.")
As I'm writing this, we have been slowly making our way towards Kentucky for some friends' wedding. It would have been too restrictive and we had attempted to add some of our Goldilocks towns to our route, so instead we are taking it easy. We figured our first two weeks as official van lifers would be stressful enough as is. Plus, now we have the flexibility to spend an extra night if a place strikes our fancy, and we can do some light detours to see key points of interest across Middle America (you know, like Indian Cave State Park in Nebraska; Blue Springs, Missouri; and Chahokia Mounds State Historic Site in Illinois). Now that we are on the road, I expect to write more regularly – stay tuned for upcoming reports on van life!
Before I get started with the back log of work – look how cute the finished product is! (That's the tail of a beetroot on the ground, if you are wondering.)
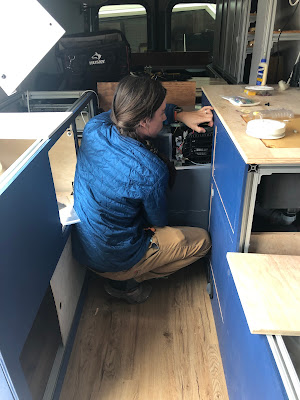
Now for the sweat (which is mostly a compilation of Cameron photos): putting the fridge back in.
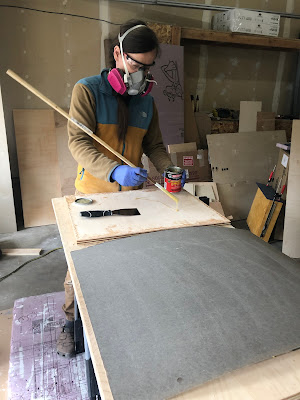
Adding contact cement in order to attach the formica to the base wood for the counter tops.
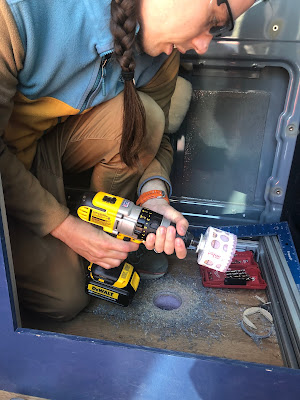
Drilling a water drain hole to the floor.
Adding waterproofing to the back wall of the shower. I spent three days driving around the greater Salt Lake Area looking for a hardware store that sold this Redgard.
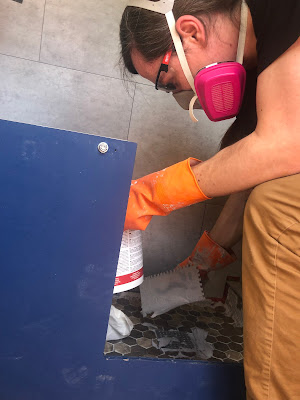
Adding tile – the top layer of shower flooring. Unless I'm forgetting something: metal van floor, XPS foam insulation, cork, vinyl floor tiles, plywood sloping, PVC shower pan liner, epoxy mortar, and then finally the tile. (Cameron says this is not at all how you are supposed to do it, but that's how we did it.)
The finished shower (more or less). You can also see our cute IKEA trash cans hung behind the two chairs.
Lining the cabinets. I also used some spare strips of this stiff fabric as the cabinet handles.
So here's the finished product! The "garage" is pretty spacious, but we managed to fill it up before leaving.
There's plenty of space to work. Theoretically we could both fit at the table, but Cameron has his own flip-up desk that he uses.
The finished look of those pesky bug nets.
And in case you are wondering, Pancake is doing just fine! She spent the first night exploring the multiple surfaces she could jump onto.


No comments:
Post a Comment